Easy Peppermint Bark Recipe (24 Perfect Pieces)
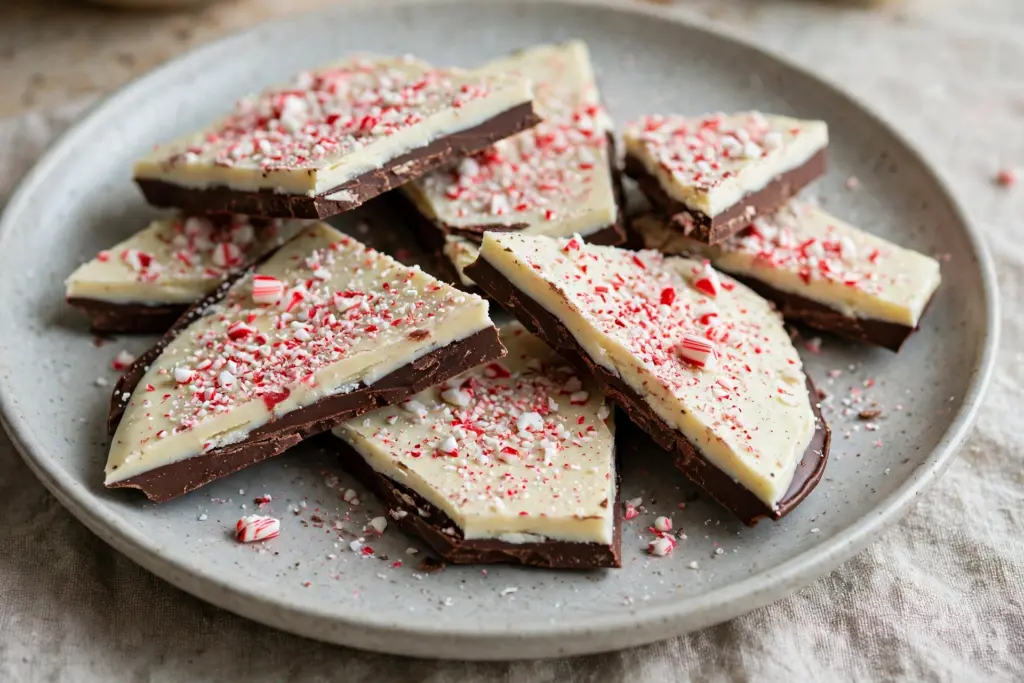
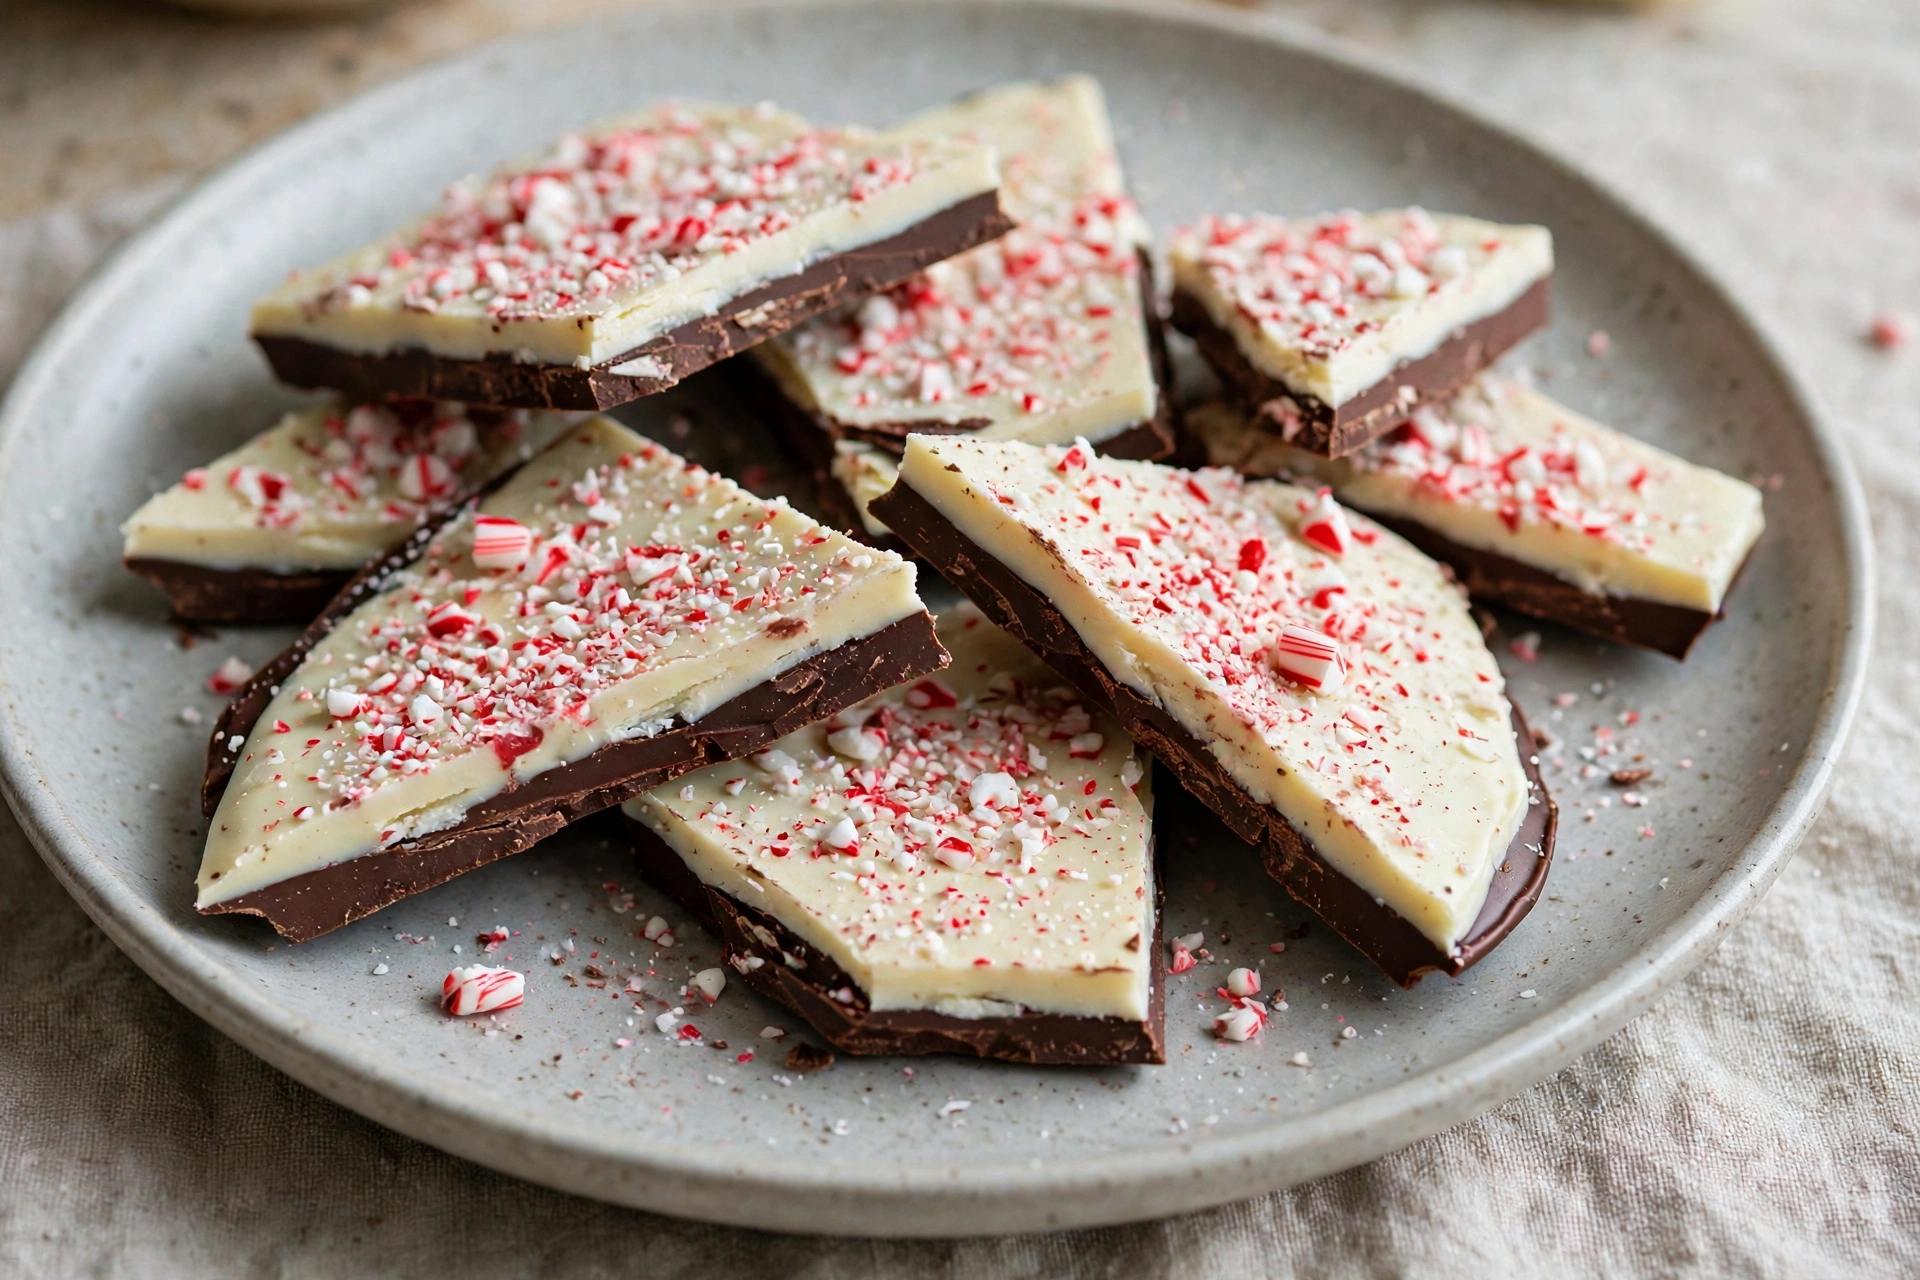
This easy peppermint bark recipe gives you a crisp dark chocolate base, a creamy white chocolate top, and a bright crunch of crushed candy canes in every bite. You do not need an oven, a candy thermometer, or any special skill. Melt, layer, chill, and break. That is the whole method, and the result looks like something from a holiday candy shop.
What is peppermint bark? Peppermint bark is a two layer candy made from dark chocolate topped with white chocolate and crushed candy canes. You melt each layer, chill the dark layer briefly, spread on the white layer, add the candy topping, then chill until firm and break it into pieces.
I keep coming back to this recipe in December because it solves a real holiday problem. It looks festive, it travels well in a tin, and it takes very little hands on time. The mint stays clean and cool rather than sharp, because the peppermint is split between the two chocolate layers instead of loaded into one.
Why You’ll Love This Easy Peppermint Bark Recipe
Here is why this easy peppermint bark recipe works so well for busy holiday weeks.
* No baking at all, so the stove stays free for other holiday cooking.
* Two clear layers and a red and white topping give a festive look with very little effort.
* The texture has real contrast: a firm snap, a smooth melt, and a light candy crunch.
* It makes 24 pieces from one pan, so one batch covers a gift tin and a dessert table.
* It keeps well in the fridge and freezer, so you can make it days ahead of a party.
Recipe Snapshot
* Servings: 24 pieces
* Course: Dessert
* Cuisine: American
* Difficulty: Easy
* Diet Tags: Freezer-Friendly
* Prep Time: 20 minutes
* Cook Time: 10 minutes
* Cooling Time: 60 minutes
* Rest Time: 10 minutes
* Total Time: 100 minutes
Ingredients
These amounts make one pan of this easy peppermint bark recipe, with enough for 24 pieces.
Dark Chocolate Layer
* 12 ounces dark chocolate, chopped into small, even pieces (bars melt more smoothly than chips)
* 1 teaspoon unsalted butter
* 1/2 teaspoon peppermint extract
White Chocolate Layer
* 12 ounces white chocolate, chopped into small, even pieces
* 1 teaspoon unsalted butter
* 1/2 teaspoon peppermint extract
* 3/4 cup crushed candy canes, for topping (from about 10 standard candy canes)
Recipe Timing
* Prep Time: 20 minutes
* Cook Time: 10 minutes
* Cooling Time: 60 minutes
* Rest Time: 10 minutes
* Total Time: 100 minutes
Equipment
* 9 inch by 13 inch rimmed baking pan
* Parchment paper
* 2 microwave safe bowls
* Heatproof spatula
* Large zip top bag and rolling pin, for crushing the candy canes
Before You Start
Line the pan with parchment paper, leaving extra paper hanging over the two long sides. This overhang works as handles later, so you can lift the whole slab out in one piece. Chop both chocolates before you start melting, and crush the candy canes just before you need them. Put the crushed candy in a small bowl by the stove or microwave, so the topping goes on while the white chocolate is still soft.
Wash your hands before handling the chocolate and candy, and keep the bowls, spatula, and spoons fully dry. Even a few drops of water can make melted chocolate thick and grainy. Gather everything for this easy peppermint bark recipe before melting starts, since the layers come together fast once the chocolate is fluid.
Instructions
Follow these steps in order for this easy peppermint bark recipe, and let the short first chill do its job before you add the white layer.
Phase 1: Melt the Dark Chocolate Layer
1. Put the chopped dark chocolate and 1 teaspoon butter in a microwave safe bowl. Heat in 30 second bursts, stirring well after each burst, for 5 minutes total. Stop when most of the chocolate has melted and a few small pieces remain, then stir until the mix turns smooth and glossy. This gentle heat keeps the chocolate from scorching, and stirring between bursts spreads the heat evenly.
2. Stir in 1/2 teaspoon peppermint extract until fully mixed.
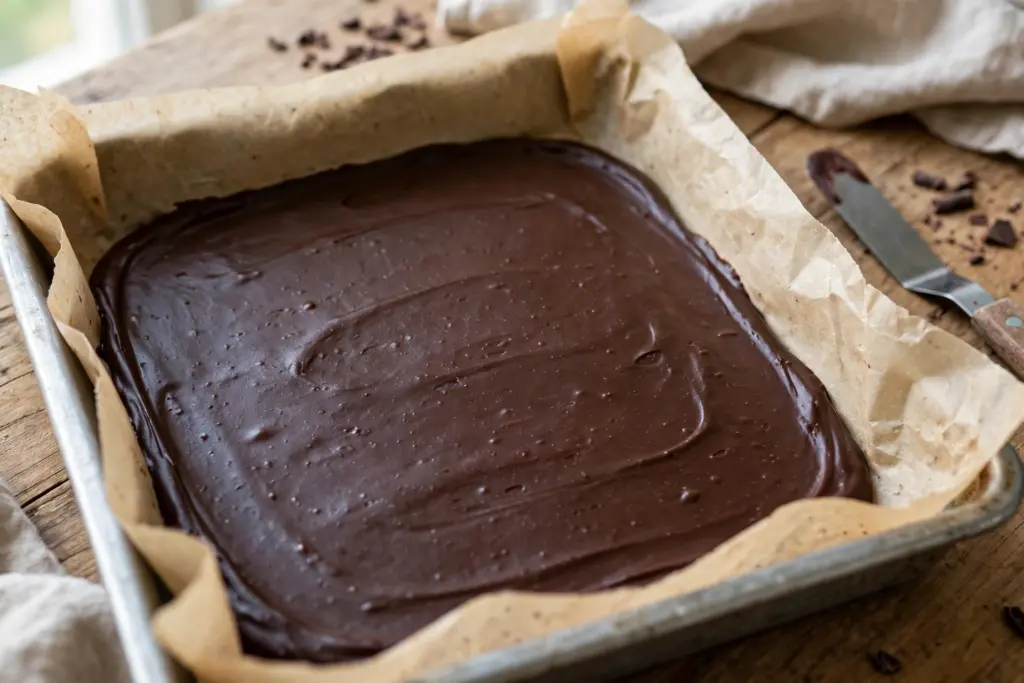
3. Pour the dark chocolate into the lined pan. Spread it into an even layer with a spatula, pushing it into the corners. Tap the pan lightly on the counter once or twice to level the surface.
4. Chill the pan in the fridge for 15 minutes, until the dark layer feels firm to a light touch but still slightly cool and tacky on top. This short chill is part of the 60 minutes Cooling Time. A tacky top helps the next layer grip, which keeps the two layers from separating later.
Phase 2: Add the White Chocolate Layer and Topping
5. Put the chopped white chocolate and 1 teaspoon butter in a second microwave safe bowl. Heat in 30 second bursts, stirring well after each burst, for 5 minutes total. Stop when most of the white chocolate has melted, then stir until smooth and creamy. White chocolate scorches faster than dark chocolate, so short bursts matter even more here.
6. Stir in the remaining 1/2 teaspoon peppermint extract until fully mixed.
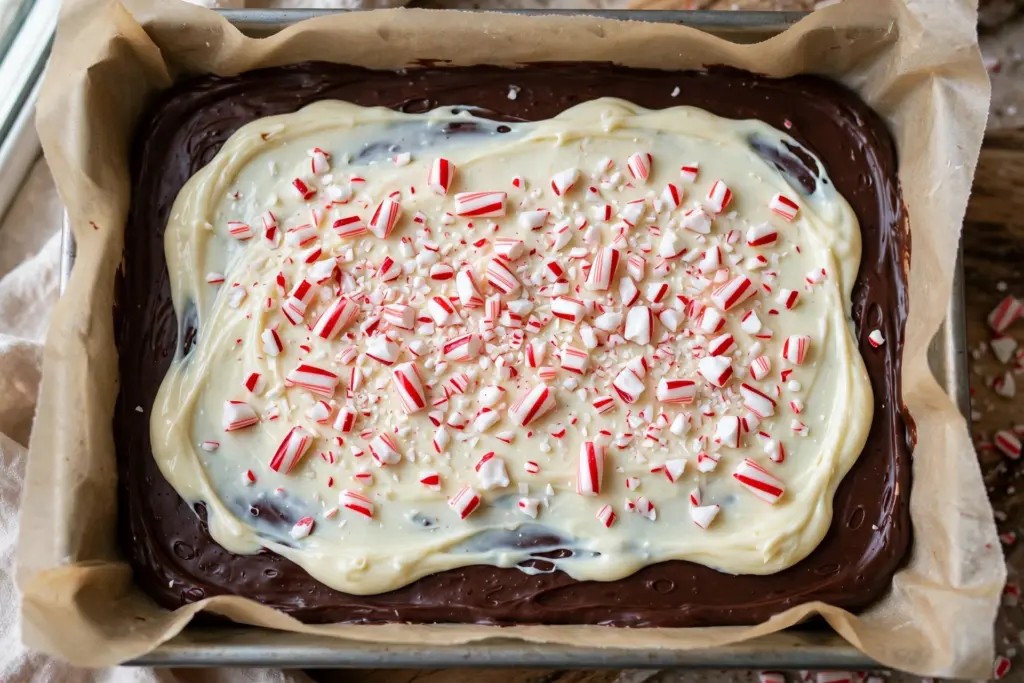
7. Pour the white chocolate over the chilled dark layer. Spread it gently into an even layer, taking care not to drag the spatula hard enough to pull up the dark layer below. Work from the center outward for the cleanest edge.
8. Sprinkle the 3/4 cup crushed candy canes evenly over the top right away, while the white chocolate is still soft. Press very lightly with clean, dry fingertips so the pieces sit in the chocolate instead of sitting loose on top.
Phase 3: Chill, Rest, and Break
9. Chill the pan in the fridge for 45 minutes, until the slab feels fully firm and cold all the way through and makes a clean snap when you lift an edge slightly. Together with the 15 minutes first chill, this gives 60 minutes Cooling Time in total.
10. Lift the slab out of the pan using the parchment overhang and place it on a cutting board. Let it rest at room temperature for 10 minutes. This Rest Time softens the chocolate just enough to cut cleanly instead of shattering into tiny shards.
11. Break the slab into 24 pieces by hand, or cut it with a large, sharp knife using firm, straight pressure. Wipe the knife clean between cuts if chocolate starts to build up on the blade.
Quick Tip: Crush the candy canes in a sealed zip top bag with a rolling pin, and leave a mix of fine crumbs and small chunks. The crumbs fill the gaps and the chunks give the crunch and color.
Quick Tip: If your kitchen is warm, return the pan to the fridge for 5 minutes if the white chocolate starts to soften while you spread it. Cold chocolate spreads less smoothly, so work in a cool room when you can.
Common Mistakes and Troubleshooting
Most problems with this easy peppermint bark recipe come down to water, heat, or chill time, and each one has a simple fix.
Problem: The two layers separate when you break the bark.
Why: The dark layer chilled too long and turned fully hard and slick, so the white layer had nothing to grip.
Fix: Chill the dark layer only until firm but still slightly tacky, about 15 minutes. If it has already turned fully hard, score the surface very lightly with a fork before pouring on the white layer.
Problem: The chocolate turns thick, stiff, and grainy while melting.
Why: Water reached the chocolate, or the heat ran too high for too long.
Fix: Start again with a clean, fully dry bowl and short 30 second bursts with stirring. Keep water, wet spoons, and steam away from the bowl.
Problem: The candy topping falls off after chilling.
Why: The topping went on after the white chocolate had already started to set.
Fix: Sprinkle the candy canes on right away, while the white layer is still soft, and press very lightly so each piece sinks in a little.
Variations
Each change below keeps the method of this easy peppermint bark recipe the same, so timing and chilling do not change.
* Swap the dark chocolate for semisweet chocolate if you want a sweeter, milder base. Keep the amounts and method the same.
* For a lighter mint flavor, use 1/4 teaspoon peppermint extract in each layer instead of 1/2 teaspoon. Taste is personal here, so start low if you are unsure.
* Add a small pinch of flaky sea salt over the white chocolate with the candy canes for a sweet and salty edge.
* Drizzle 2 ounces of extra melted dark chocolate in thin lines over the set white layer before the final chill, for a striped look. This is a garnish, not a third layer, so the timing does not change.
Allergen Information
Contains: dairy, soy.
Dark chocolate and white chocolate commonly contain soy lecithin, and white chocolate and butter contain dairy, so when you shop for this easy peppermint bark recipe, check the labels on the exact bars you buy. For a dairy-free version, use dairy-free dark and white chocolate and a dairy-free butter alternative, and check that the alternative still melts smoothly. For a soy-free version, look for chocolate bars labeled soy-free, since soy lecithin is common in standard chocolate. This recipe as written contains dairy and soy.
Serving Suggestions
This easy peppermint bark recipe suits both a quiet night at home and a full holiday table.
* Set the pieces on a dessert table with hot chocolate, coffee, or tea for a simple holiday spread.
* Pack 4 to 6 pieces in a small tin or cellophane bag tied with ribbon for an easy food gift.
* Serve a small plate of bark with Shortbread Cookies (https://www.deliciousbykandy.com/shortbread-cookies-recipe/) for a cookie and candy board that covers both buttery and minty flavors.
* Crumble a piece over vanilla ice cream for a quick mint chocolate topping.
Storage, Freezing, and Make-Ahead
One reason this easy peppermint bark recipe is good for gifting is how well it keeps. Store the bark in an airtight container in the fridge for up to 3 weeks. Put parchment paper between layers so the pieces do not stick together. Keep it away from strong smelling foods, since chocolate picks up odors easily.
For freezing, place the pieces in a single layer in a freezer safe container with parchment between layers, and freeze for up to 3 months. Thaw in the fridge overnight, then rest at room temperature for 10 minutes before serving so the texture softens. This is a strong make-ahead choice: make it up to 3 weeks ahead for the fridge, or up to 3 months ahead for the freezer, and break or cut it after chilling as above.
No reheating is needed. If the bark has been in the fridge, a short 10 minute rest at room temperature is enough before serving.
Nutrition
Per piece, based on 24 pieces:
* Calories: 180
* Protein: 2g
* Carbohydrates: 20g
* Fat: 10g
* Fiber: 1g
* Sugar: 18g
* Sodium: 15mg
Values are approximate and may vary based on exact ingredients and brands used.
Frequently Asked Questions
How long does this easy peppermint bark recipe take to set?
It takes 60 minutes of Cooling Time in total: 15 minutes for the dark layer, then 45 minutes for the finished slab. After that, give it 10 minutes Rest Time at room temperature before breaking or cutting. The full time from start to finished pieces is 100 minutes, with only 30 minutes of active prep and melting work.
Can I make peppermint bark ahead of time?
Yes, this is one of the best make-ahead holiday candies. Keep it in an airtight container in the fridge for up to 3 weeks, or freeze it for up to 3 months with parchment between layers. Thaw frozen bark in the fridge overnight and rest it for 10 minutes at room temperature before serving.
Does this recipe contain dairy or soy?
Yes. This recipe contains dairy and soy. The dairy comes from white chocolate and butter, and the soy commonly comes from soy lecithin in dark and white chocolate. Check your chocolate labels, and for a dairy-free or soy-free version, pick bars made for that need and test a small melt first.
Why did my layers separate?
The dark layer likely chilled too long and turned fully hard before the white layer went on. Chill it only until firm but still slightly tacky, about 15 minutes, so the next layer can grip. Scoring a fully hard layer very lightly can help, but the short first chill is the simplest fix.
Can I use chocolate chips instead of chopped chocolate bars?
You can, but in this easy peppermint bark recipe, bars give a smoother melt and a cleaner snap. Chips hold their shape with added stabilizers, so they can melt thicker and set a little softer. If chips are all you have, melt them in the same short bursts and stir well, and expect a slightly less crisp break.
Can I use crushed peppermint candies instead of candy canes?
Yes. For this easy peppermint bark recipe, use the same amount, 3/4 cup crushed, and crush them the same way in a sealed bag. Hard peppermint candies give the same mint flavor and crunch, so pick whichever you already have at home.
Tried this one? Leave a rating and a comment below and tell me how your layers turned out, and what you paired the bark with.
Conclusion
This easy peppermint bark recipe earns its place in a holiday kitchen because it asks for so little and gives back so much: a clean snap, a cool mint finish, and a pan full of pieces ready to share. Make one batch for the house and one for gifts, and you will see why this simple two layer candy shows up on my table every December.
Easy Peppermint Bark Recipe (24 Perfect Pieces)
Ingredients
Method
- Line a 9 inch by 13 inch rimmed pan with parchment, leaving overhang on the long sides.
- Melt dark chocolate with 1 teaspoon butter in 30 second bursts for 5 minutes total, stirring between bursts, until smooth. Stir in 1/2 teaspoon peppermint extract.
- Spread dark chocolate in the pan and chill for 15 minutes, until firm but slightly tacky.
- Melt white chocolate with 1 teaspoon butter in 30 second bursts for 5 minutes total, stirring between bursts, until smooth. Stir in 1/2 teaspoon peppermint extract.
- Spread white chocolate over the dark layer and sprinkle on 3/4 cup crushed candy canes right away, pressing very lightly.
- Chill for 45 minutes, until fully firm. Total Cooling Time is 60 minutes.
- Lift out with the parchment, rest for 10 minutes at room temperature, then break or cut into 24 pieces.